


Tie-Dye Resists
I'll start you out with an example dye that covers some basic resist techniques.
An Example Dye
I'm going to show you a whole process from start to finish to give you a clear picture (actually a series of them) of how resists work to yield a final product.
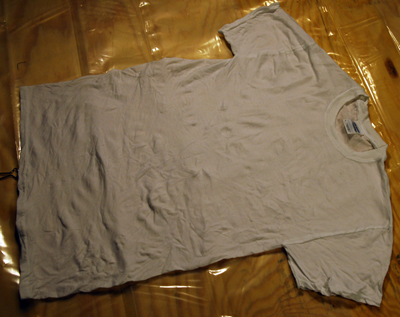
The prepped shirt ready to dye. Prep includes washing, a quick soak in activator solution that's thoroughly wrung out, and spreading smooth on the work surface.
First I'm going to apply dye. This is the primary solution to the ALTD problem (Amateur-Looking Tie-Dye), which results from applying resists before applying dye - the result is a largely white shirt (or fabric) with blotches of strong color. The contrast between undyed fabric and strongly dyed fabric is generally not terribly attractive unless carefully managed.
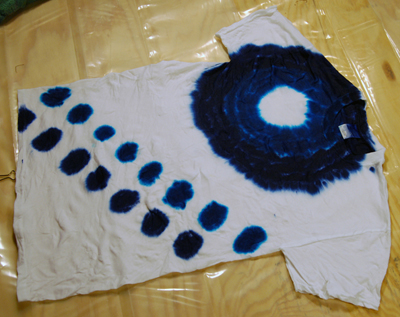
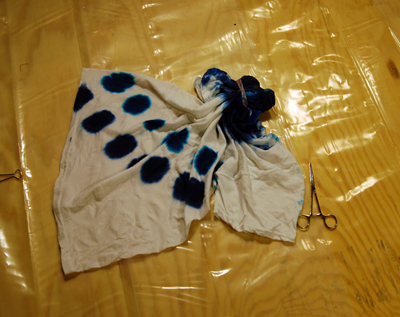
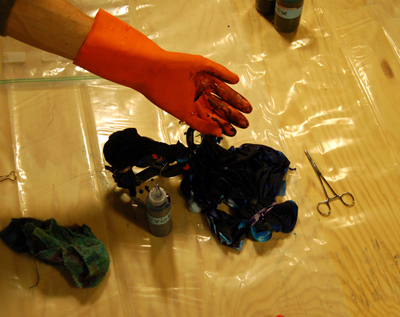
Two blue dyes applied in areas that will receive resists. The two rows of dye spots will get pleated and clamped, while the circular applications will get twisted to form a spiral.
Next we make a spiral, best started with a pair of hemostats or needle-nosed pliars. A pinch of fabric is grabbed, then the tool is turned to gather up the fabric. Keep your fingers over the gathering fabric to prevent the forming pleats from getting progressively wider, also helping the pleats to form in areas that are being drawn in.
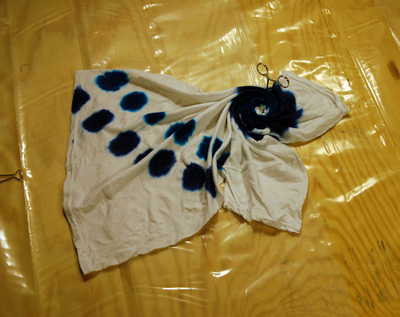
The shirt with small spiral area formed by turning the hemostats and carefully keeping the forming pleats regular.
Next the hemostats are removed and the twisted area banded with thick rubber bands.
Banded across the spiral. Applying a resist across the spiral-twisted fabric will define the spiral, alternatively dye can be applied in straight lines across the spiral. Of course, the resists will only have effect in this case when overdyed, defining the twisted pattern.
Next the diagonal applications of dye spots are gathered carefully into pleats, matching up the dyed spots together.
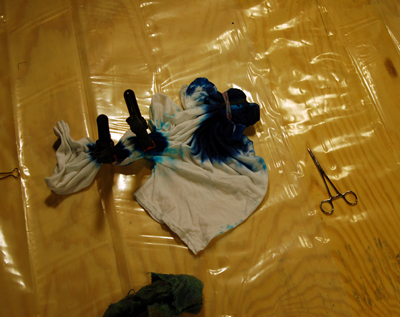
Diagonal dye applications are gathered into pleats and clamped. The two rows of dye spots are pleated and clamped, and will later be overdyed to define the resist.
White is dangerous, being of highest contrast, particularly when working with intense colors. However, it can make excellent highlights and can be useful if carefully integrated into a color/contrast schema.
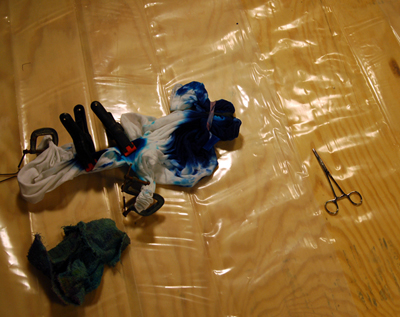
Pleated undyed areas are clamped with C-clamps. The result will be clearly defined white circles when a limited number of pleats are clamped. With more pleats, the definition of the resist areas are lost, and the middle pleated areas form larger and larger resists.
After the application of an overdye in a darker shade, additional resists are applied prior to application of the final overdye.
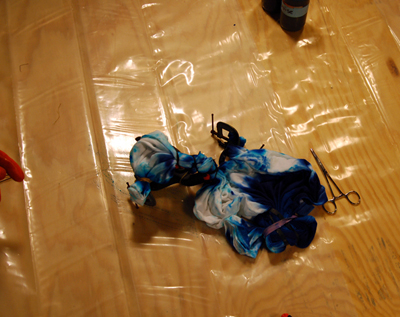
Overdye applied and then additional resists. Layering of dyes and overdyes is essential to building complexity and interest.
Finally, the purple overdye is applied and squeezed into the fabric.
Final overdyeing. Resists are typically much more resistant to the penetration of applied dye than you will expect. Don't be afraid to part pleated fabric and apply dye between each pleat, or to apply dye and squeeze it into the fabric. A common failure is to apply dyes onto the surfaces without encouraging penetration.
The final shirt. While I like the contrasts, and in this darker picture the shirt has an ultraviolet and delicious spectral component, I was dissatisfied with the final product.
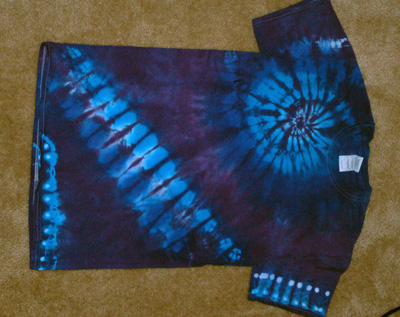
The final shirt. Unfortunately it looks better in the picture than in reality, as the dyes did not set as darkly and with as high a contrast as this picture would suggest.
Why show you what I think was, in the final analysis, a failure? Because you see from this example how to generate the basic motifs through simple resists. And if I'd done a better job letting the dyes react thoroughly, and had used freshly-prepared solutions, the shirt really would have been striking. In fact, I'm going to redux this in hopes of catching some of the same effects: in particular the clamped and banded area along the bottom hem, the central part of the spiral and the upper corner where the turquoise color fades to white, and the butterfly-like central areas of the clamped diagonal stripe.
Despite my dissatisfaction with the final product, I think this is an excellent example of how the combination of complexity and simplicity is the key to a fine dye. Simplicity yields success when thoughtfully chosen motifs and color combinations are used sparingly, and complexity yields success through layering. Don't overwork the number of different resists, but don't be afraid of making a lot of them, especially if you can do them precisely and distinctly. Pick colors carefully and use the biggest advantage of tie-dye: blending. Gradients of color are the prime strength of tie-dye - stark color changes look gaudy. To me the central aspect of tie-dye is gesture - dye as you would like to dance.
Dye Application with Resists
White is dangerous, particularly if left inadvertently. Most of your resists should cover a base color, yielding a gradient of color when overdyed. Some dyers will apply resists to an undyed fabric and will then inject dyes into the gathered fabric with syringe and needle, which does yield excellent results, but in the absence of the equipment and technical knowledge of how to perform that technique, put down some dye before applying resists. White is like a shout - appropriate in its place, but as Emerson says: "What you are shouts so loudly in my ears I cannot hear what you say."
Various Resists
Anything that blocks, slows, or alters the penetration of dye into the fabric is a resist, and is the core of the technique. There are the obvious candidates: string, rope, twine, thread, rubber bands, tape, clamps, hemostats, dye-resisting pastes and waxes. In association with various methods of gathering fabric to apply resists: twisting, pleating, pinching, drawing, inserting items, stitching. Your duty as an artist in tie-dye is to both practice and become expert in traditional techniques and to step beyond them: to think of dye concentrations and gradients, stronger to weaker, diluted and concentrated, applied and removed. Any way you can change the way that dye attaches to fabric is a manipulation that can talk to your art. You want to know when you apply dye that it will be painfully strong where it needs to be, and fade away when you want it to, and disappear like a magic trick when that serves your desire.